The idea for reflectors for dog collars first occurred to me when I almost lost my canines in the dark. The problem was that I had left them off leash to play in the ground, but given their mischievous nature they soon ran off to the distance leaving me with no idea as to where they went.
And even though the park was safely guarded by boundaries from all sides, it is still a fearful instance for any pet owner, and therefore without wasting any more time I started scrolling through the top reflectors for dog collars that were pretty much low budget but durable in their quality.
So, if you too have been looking for ideas on making your own DIY reflective dog collars, you have arrived at the right place. But first let’s start by understanding what makes them unique from other collars.
Table of Contents
What are Reflective Dog Collars?
Contrary to normal dog collars, reflective dog collars are exactly what their name suggests. They are made up of reflective materials which upon coming in contact with a light source reflects back the ray, intimating others of the dog’s presence.
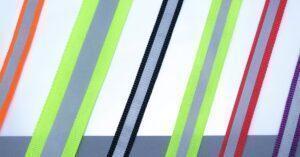
Such collars are mostly utilized for safety purposes and can consist of various base products including reflective stripes, tapes, or led lights which may either have been stitched onto the collar or infused with it to produce the desired result. Usually depending upon the type of reflective material used, the price of these collars may vary greatly.
Commonly these collars are also referred to as glow-in-the-dark collars, thanks to their unique performance. And while they were previously limited to use in collars only, their rising popularity has led up to the creation of reflective harnesses, leashes and so much more, ensuring total safety for all canines when outside in the dark.
What are the Top 3 Reflectors for Dog Collars for Low Budget DIY Ideas?
So, as per my experience, I find reflective tapes, special collar LED lights and reflective stitching to be the top 3 reflectors for dog collars for low budget DIY Ideas at home. All of these are fairly easy to find and cost way less than those available in the market. However, you do need to have a proper idea of what you are doing to get the desired results.
Here are a few ways of designing your own low budget DIY Ideas with the top 3 reflectors for dog collars.
Using Reflective Tapes
For this you will need:
- High quality reflective tape
- Waterproof coating
- A standard sized dog collar
- Scissors
- Iron
Step 1: Depending upon the collar size and length, cut a generous piece of the reflective tape and then attach it directly over the collar.
Step 2: Make sure to let the tape cover all areas, even the ones under the buckle or loops to offer maximum coverage and therefore better reflection in the dark.
Step 3: Some collars might need extra adjustments for them to maintain their nature for long, and hence depending upon their usage guidelines, you can also choose to use a pressing iron over the reflective tape. However this needs to be done very carefully, and only if mentioned clearly in the manufacturer’s guidelines for the proper use of the product.
Step 4: Finally applying a decent amount of waterproof coating over the whole new setup will make the collar even more durable and long-lasting. But this also depends upon the particular manufacturing of the reflective tape and therefore cross-checking with the usage guidelines is a must.
Pros:
- Such collars cost way less than the ones available in market
- The reflective tapes reflect a great amount of light when implemented properly
- They are cost effective and can be easily customized
- Can be of various colors
- Easy to make and lasts long
Cons:
- The tape will lose its stickiness over time
- Not suitable for extreme weather conditions
Investing in Collar Specific LED Lights
You will need:
- Collar specific LED Lights
- A rechargeable battery
- Industry grade sticking tape
Step 1: Take the dog collar and carefully place the LED Lights all over the front side of the collar. Inserting the lights onto the other side may not be comfortable for the dog and in worse cases also risk getting shocks.
Step 2: Connect the end of the lights to a rechargeable battery which needs to be adjusted to the collar after the connection is made. Make sure to not install a bulky battery as it could add extra weight to the dog’s neck.
Step 3: Try and follow the directions carefully. But if the work seems impossible then you may seek aid from a friend or family for greater efficiency.
Step 4: Once done, it is better to cover them with a waterproof coating or waterproof tape, so that the LEDs stay unaffected from the outside weather.
Pros:
- Many color options are available
- Rechargeable battery is perfect for long term use
- May have different flash modes
- Visible in both day and dark
- Easy to customize into various designs
Cons:
- Overall setup is a headache
- Requires optimal connection for them to work
- The LED lights setup is pretty expensive compared to the other reflectors for dog collars
Reflective Stitches as the Last option
To create low budget reflective dog collars on your own with reflective stitches you will need:
- Reflective yarn
- Dog collar
- Waterproof coating
- Scissors
Step 1: In this process take the dog collar and start sewing the reflective yarn directly onto its surface. These yarns are specially manufactured to be directly used as normal threads and therefore any individual with basic sewing knowledge can achieve the desired result.
Step 2: Based upon the thickness and size of the dog collar, you may have to follow it up with a number of layers for the yarn to be perfectly visible to the naked eye.
Step 3: It is best to sew the yarn onto the two sides of the horizontal dog collar, although I also used them to create little paw designs all around my pup’s dog collar. This allowed a better and wider reflective surface and hence more protection for my dogs in the dark.
Step 4: Finally I ended the process by applying three layers of a waterproof coating. This was to ensure long-lasting and high efficiency during harsh environmental conditions and I am happy to say that this has also stayed up until now.
Pros:
- Perfect for everyday usage
- Goes a long way and is greatly cost-effective
- Can be both hand washed and machine washed
- Available in multiple colors
- Easy to set up and customize
Cons:
- Requires at least basic sewing experience
- Finding the perfect reflective yarn is an arduous task
- Not good when in constant contact with moisture
Why do I prefer DIY Ideas for Reflective Dog Collars?
To start off, there are two reasons as to why I don’t indulge myself in purchasing reflective dog collars from the market.
First of all I love making things, and so the idea of my boys wearing something that I created from scratch excites me the most. And secondly, I am a little skeptical about the quality of these things from the market. Although I am not throwing shade to any of the manufacturers, it is just my personal choice and nothing else.
Thus, at the end it is your own choice when it comes to choosing reflective dog collars for your dog. You can either choose to make your own by getting the top 3 reflectors for dog collars or completely avoid the hassle and just purchase one from a trusted manufacturer.
You may also like:
Why does my Dog Sleep Under my Bed?
If you are a dog lover then, Subscribe to our weekly newsletters. No Spams!


